by Rebecca Bystrom | Nov 6, 2015 | TSP Journal |
WOW! That CD looks great on your wall…. says no one ever!

Then why as consumers do we automatically request to have the CD with all our images from our most recent photo session?
It’s very rare that you’ll print all the images.
There may be a few select pictures that will make it to print & get framed.
Who the heck still gives out CD’s?!!!
Our technology is evolving. Did you know that new computers are no longer made with CD drives?? MIND BLOWING!! That’s a shocker, eh?
At TellaStory Photography, we strive to give a wholesome experience.
From start to finish. From the pre-consultation, to session day.
Right on down to the gallery reveal meeting.
It’s all about the details.
As much as I would love to ‘stop giving away digitals’ and go to strictly print purchases.
I want you as my client to feel like you are receiving your memories.
I don’t want your images to sit stagnant on my computer.
I want your images in your hands so you can enjoy them.
PLEASE do not hang your flash drive or CD directly on the wall….. I was displaying a little sarcasm.
Consider getting professional prints made. Prints of high standards and quality so you can be sure they will not wrinkle, warp or fade over time.
Leave the printing to the professionals. The long term cost is so worth it! All you have to do is trust me.
It’s no secret that I LOVE to shop!! I am constantly on the look out for new and creative ways to display YOUR art.
Let’s get your images OFF that CD– OFF that flash drive– OFF my computer!
Let’s get your images into your home. Onto Your Walls. And fill your hearts with those cherished memories.


Above pictured from left to right & on-down the line.
Stack of Float Wraps. Also available canvas and standard prints.
Magnetic Accordian Albums
Flush mount Album- these are great & NOT just for weddings.
Barn Wood Print– need I say more? SUPER AWESOME!
Acrylic Glass Block — ALL NEW. Super fun way to display your pictures at home or at work.
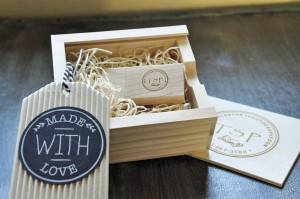
There is so much more to show you!! -these are just a few samples of images I had stored on an image CD 😉
by Rebecca Bystrom | Jun 29, 2015 | TSP Journal |
DIY ~ Wedding Gift {Photo Coasters}…
Looking for that ultimate DIY unique wedding gift? Lets face it. Everybody likes to give the “traditional” or perhaps straight off the gift registry.
I find this to be mundane and expected. The element of surprise when gift giving is key throw in a hint of a WOW factor it’s a gift to be remembered! by adding special touch to a momentous occasion. Nobody will be remembered for the amount of money given, or “that” gift that will eventually be forgotten about.
I found a low-budget easy DIY solution.
Customized Photo Coasters.

Ok, I know not everyone uses coasters, but there are multiple purposes to these little gems.
For starters, they are unique.
The couple receiving this gift can use these as wall art, by hanging them in clusters, or perhaps to keep a houseplant from leaving marks.
Maybe you like to have a glass of water in bed but don’t want to leave those unsightly water rings on the nightstand. HAZAAH!!
Use your imagination. This is a gift that is sure to keep giving no matter how this couple uses them. Because they house some very special images from their wedding they surely won’t want to forget.
Ok. Let’s talk shop. To make these fun little do-dads.
DIRECTIONS
I found white tiles sized 4×4 at the local restore store for {extremely affordable}.
You may also find tiles at a local hardware store, Menards, Lowes, Home Depot.
The important part is to be sure they have a smooth surface.
Next. Pick up a package of round chair pads. {they are self-adhesive}
If these are used as coasters, we don’t want the bottom edge of the tile to scratch the surface.
Hindsight after making these I thought maybe felt can be glued across the bottom as a layer of protection?
Either way we don’t want these fabulous coasters to leave marks.
If you are using these as wall art. I recommend 3M Velcro hangers. These are AMAZING!!
And removable should you or your gift recipient decide to change your décor or re-arrange wall art.
Print out your favorite images you’d like to use for this project.
Maybe it’s not pictures, you can recycle fun cards, calendars or funky scrapbook paper.
Choose your top layer design.
Cut the image to the size of the tile.
You will need to cut the top layer ¼”smaller than the outer edge of the tile.
Any overhang from the top layer may cause the top design to peal away over time.
I used Modge Podge to glue my images onto the clean surface of the tile. {Crafters friend}
You can use diluted Elmers glue as well.

Once the top layer has been secured and glued to the tile WITH dry time of a few hours or overnight. Let these dry.
If you try to add the top coat before the image is fully adhered to the tile, the image will move around, wrinkle and will be difficult to work with. (Lesson learned the hard way)
Add a top coat of modge podge for added protection of your chosen image.
I used a foam brush to apply the modge podge over the top layer. Apply several coats for protection.
Leave plenty of dry time between each coat so there is no cracking of the modge podge.


After I created these, I started to think maybe a spray paint, clear acrylic may be an alternative. I’ll have to try it out next time. Trial & error to see what works best. If you have tried this, I’d love to hear from you, maybe even learn a few new tricks for applications! I will be making these in the future ~ For now, the final product is a unique gift I’m sure any receiving couple would love!
Thank you for checking us out! Stay Tuned I have lots more coming out of the craft room.
God-bless
~B